Introduction to CAM-DUMPER
CAM-DUMPER is a Linux-based cam grabbing tool designed for use within the Termux environment. This utility allows users to capture images from the front camera of a target device by sending a simple link. It was developed with a focus on ethical use cases, enabling individuals to identify wrongdoers on the internet. It is important to emphasize that this tool should only be employed with proper authorization and permissions, and not for unlawful activities.
Key Features
Remote Image Capture: CAM-DUMPER leverages JavaScript to remotely capture images from the front camera of a target device, making it a reliable tool for obtaining visual evidence.
Simplicity: This tool is engineered to be lightweight and efficient, ensuring minimal code complexity. It serves as an excellent resource for those interested in understanding the mechanics of such tools.
Data Organization: All captured files are systematically saved in a dedicated folder within your Termux environment, facilitating easy access and management.
IP Tracking: CAM-DUMPER provides the IP address of the person who clicks on the link, allowing users to gather additional information, such as location details, about the target.Developer Information & Credits
CAM-DUMPER was created by LiNuX-Mallu and is hosted on GitHub. To explore more of their projects and contributions, visit their GitHub profile: @LiNuX-Mallu/CAM-DUMPER.
Ethical Use Disclaimer
It is essential to emphasize that CAM-DUMPER and the information provided here are intended solely for educational purposes. This tool and this platform do not endorse or support any criminal activities. Any misuse of this information or tool is discouraged and is the sole responsibility of the user. We advocate for ethical hacking practices and encourage responsible and authorized use of such tools.
Installation Guide for CAM-DUMPER Tool in Termux
Step 1: Update Pre-installed Packages
Before installing CAM-DUMPER or any other tool in Termux, it’s essential to update all pre-installed packages to ensure a smooth installation process and usage. Execute the following command:
pkg update && pkg upgrade -yThis command will update all the pre-installed packages in Termux.
Step 2: Install Required Packages
As CAM-DUMPER is hosted on a GitHub repository, we need to install the necessary packages, including git, PHP for starting a PHP server, curl for file retrieval, jq for JavaScript processing, and wget for data retrieval. You can install these packages simultaneously using the following command:
apt install git php wget curl jq cloudflared opensshRunning this command will efficiently install all the required packages in a timely manner.
Step 3: Clone CAM-DUMPER Tool
Now, we will proceed to clone the CAM-DUMPER tool from the GitHub repository. Execute the following command to download and install CAM-DUMPER in your Termux environment:
git clone https://github.com/LiNuX-Mallu/CAM-DUMPER.gitThis command will initiate the download and installation of the CAM-DUMPER tool in your Termux terminal, making it ready for use.
Step 4: Accessing the Downloaded Tool
With the CAM-DUMPER tool downloaded in your Termux environment, the next step is to navigate to the project folder to commence working with it. If you are unfamiliar with basic Termux commands, we recommend reviewing this post: [Termux all Basic Command].
Execute the following command to access the CAM-DUMPER project folder:
cd CAM-DUMPERThis command will change your current directory to the CAM-DUMPER folder, allowing you to work within its context.
Step 5: Setting Permissions for Tool Execution
For CAM-DUMPER to function properly, it requires the necessary permissions to execute. While it may function without explicit permission settings, it is considered best practice to grant the tool execute permissions, which will be indicated by the appearance of a green color prompt.
Execute the following command to assign execute permissions to the camdumper.sh file:
chmod +x camdumper.shIf you observe no visible response after entering this command, rest assured that you have successfully completed this step.
Running the CAM-DUMPER Tool in Termux
Step 1: Launching the Tool
Now that everything is set up, it’s time to execute the CAM-DUMPER tool using the bash command. If you’ve restarted Termux, make sure to change your directory to the camdumper folder by following the instructions in Step 4 (previously explained). To initiate the tool, enter the following command:
bash camdumper.shExecuting this command will launch the tool, and you’ll be greeted by the introduction screen.
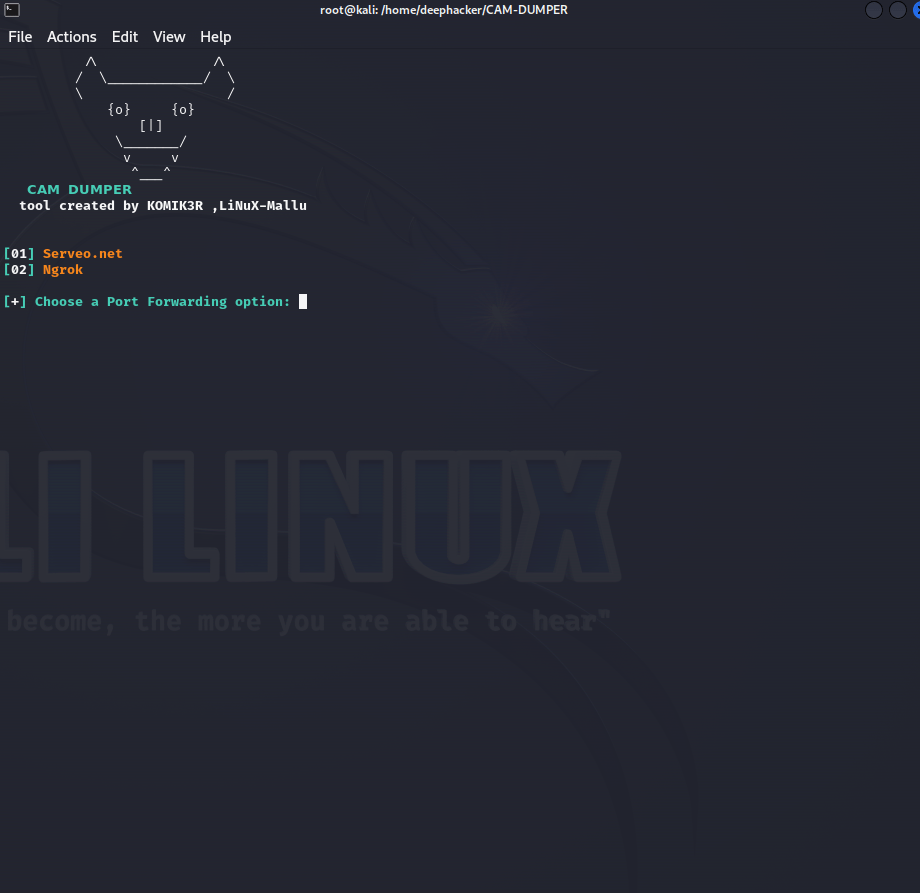
Step 2: Accessing the Main Menu
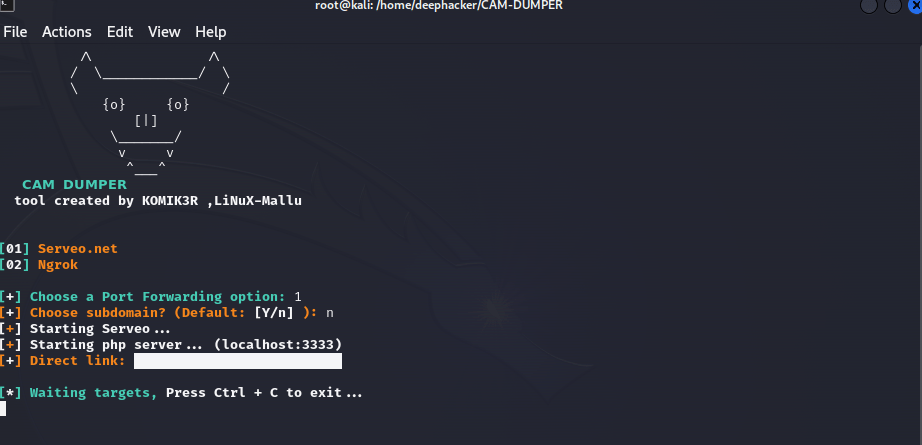
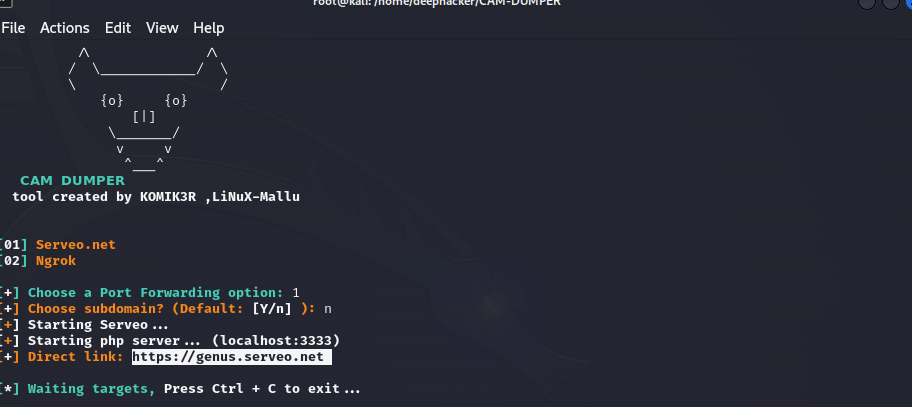
Upon launching the tool, you will encounter the CAM-DUMPER main menu. Here, you will need to choose between two options: [01] Serveo.net and [02] Ngrok. Due to occasional glitches and instability, we recommend opting for serveo.net to create a local host server in Termux. Select serveo.net by typing ‘1’ in your terminal and pressing ‘Enter’. After selecting the first option, press ‘Enter’ twice to skip additional options.

Step 3: Starting the Tunnel(Termux)
Assuming you’ve completed Step 2 correctly, you now have a running PHP server in your Termux environment. To create a tunnel from your localhost to the internet, open a new Termux session by swiping from the left side of your screen to the right within the Termux terminal. Then, click on “new session.” Copy and paste the following command:(in terminal no need to apply this)
cloudflared tunnel --url http://127.0.0.1:3333Step 4: Obtaining the Link
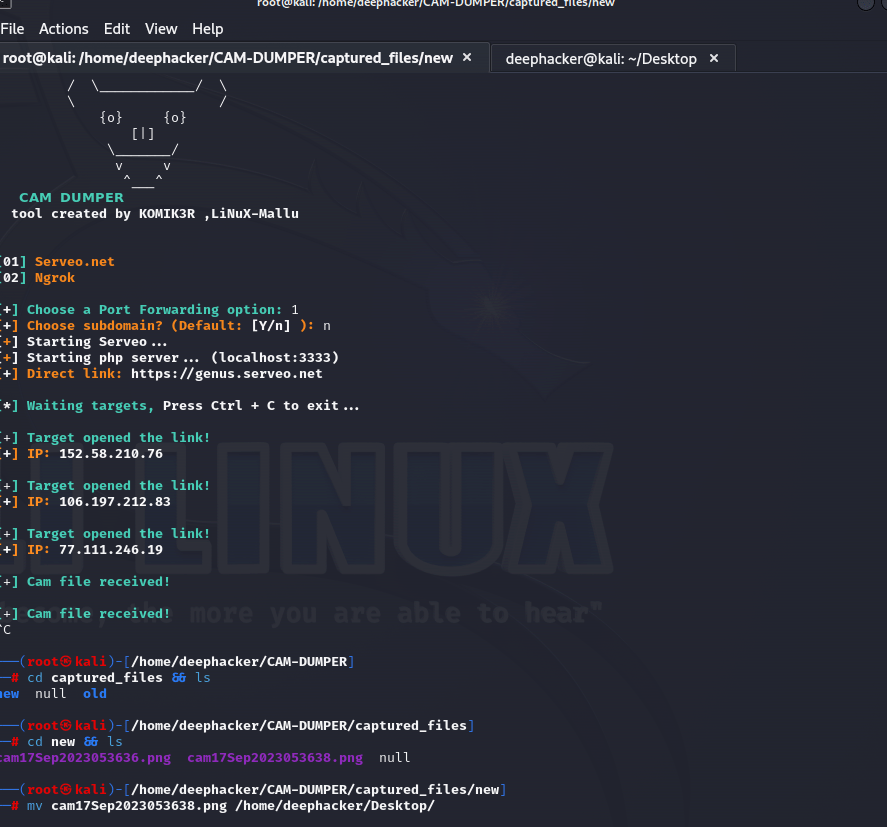
The above command will initiate a Cloudflared tunnel, resulting in the generation of a link. This link should look similar to the one shown in the screenshot below. Copy this link and share it with the intended recipient. Please ensure that this tool is used responsibly and not for illegal purposes.
Step 5: Capturing Images
Now, wait for the victim to click on the link. When the victim grants camera access, the tool will immediately begin capturing image files from the front camera. These captured files will be stored in your Termux storage. To exit the tool, press CTRL + C.

Step 6: Viewing Captured Images
To view the captured files in your Termux environment, you should be familiar with Termux Basic Commands. Simply use the ls command to list the contents of your current directory. You will see a folder named “captured.” Navigate into this folder using the following command:
cd captured_files && lsWithin this directory, there are two folders: “new” and “old.” You can access the most recently captured images by entering the “new” directory with the following command:
cd new && lsAlternatively, you can enter the “old” directory to view older captured images.
Step 7: Moving Captured Files
To access the captured images outside of Termux, you’ll need to move them to your internal storage. Use the mv command to move the files to the internal storage with the following command:
mv * /data/data/com.termux/files/home/storage/sharedAfter executing this command, open any file manager, go to your internal storage, scroll down, and you will find all the captured images there.(for Terminal)
conclusion
The installation and usage of the CAM-DUMPER tool in Termux have been detailed in a systematic and responsible manner. This tool serves a specific purpose, but it is crucial to emphasize that its utilization should always adhere to ethical standards and comply with legal regulations.the CAM-DUMPER tool can be a valuable resource for legitimate and authorized purposes, such as investigations or personal security, but it should never be used for unethical or unlawful activities. Always obtain proper authorization and follow legal guidelines when utilizing such tools.
For more updates, join us on:
WhatsApp Telegram